REAPER
DarkStage follows REAPER's transport and position through REAPER's built-in OSC control surface — no MIDI port, script or extension.
Before you begin: install and launch DarkStage, open DAW Sync, choose REAPER, confirm DAW Sync is running, and leave DarkStage open while you configure REAPER. See DAW Setup.
REAPER setup
REAPER connects through its own built-in OSC control surface — no MIDI port, no script, no extension. It's a text file and one preferences dialog, the lightest integration DarkStage has.
1. Install the DarkStage integration
Install the DarkStage REAPER Integration from DarkStage's DAW Sync settings. It adds one pattern file and changes nothing else in REAPER.
2. Add an OSC control surface
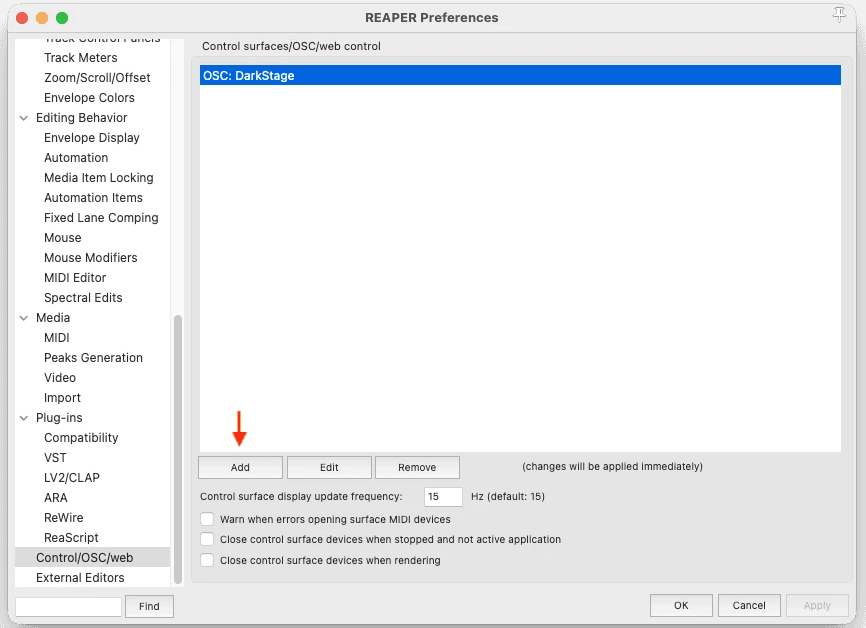
In REAPER, open Options ▸ Preferences ▸ Control/OSC/web and click Add.
3. Choose OSC mode
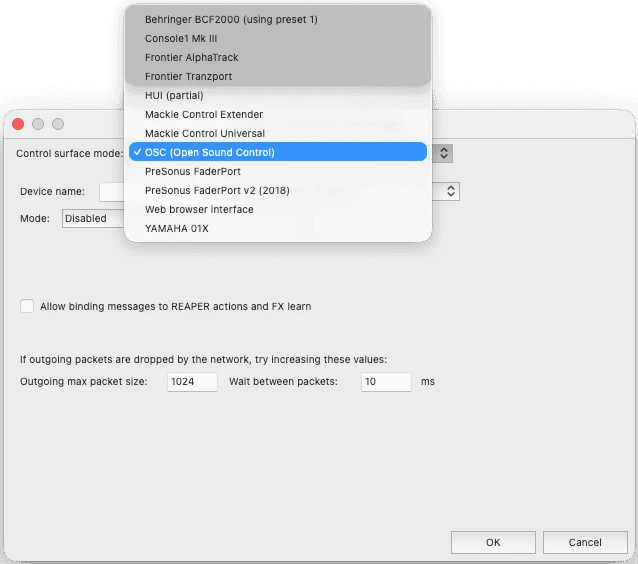
Set Control surface mode to OSC (Open Sound Control).
4. Set the one-way send mode
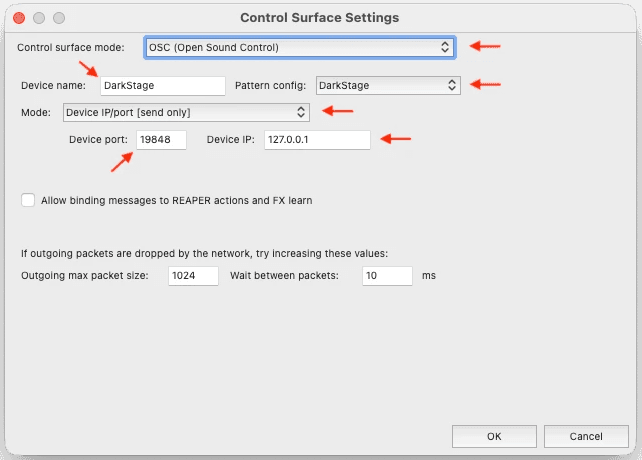
Set Mode to this. It's what keeps the connection one-way — DarkStage watches REAPER and can never control it:
Device IP/port [send only]
- Set Device IP to
127.0.0.1and Device port to19848. - Set Pattern config to DarkStage.
- Leave Allow binding messages to REAPER actions and FX learn unticked, then click OK.
5. You're connected
DarkStage follows REAPER's edit cursor while stopped, its play position while rolling, and its Play, Stop and Record state. Choose which counter to show with the REAPER Counter setting in DarkStage — REAPER sends Bars + Beats, Min:Sec and Timecode at once and doesn't say which its toolbar is showing.
That control lives on the Counter widget: Wired Displays ▸ Counter ▸ Counter Format.
Separate SMPTE / MTC setup
The OSC surface drives the main counter and Play / Stop / Record. MIDI Timecode drives the separate SMPTE widget. They're independent — set up both if you want both.
Moving the edit cursor while REAPER is stopped does not move the SMPTE widget: REAPER's timecode generator is a timeline item that produces timecode as the transport passes over it.
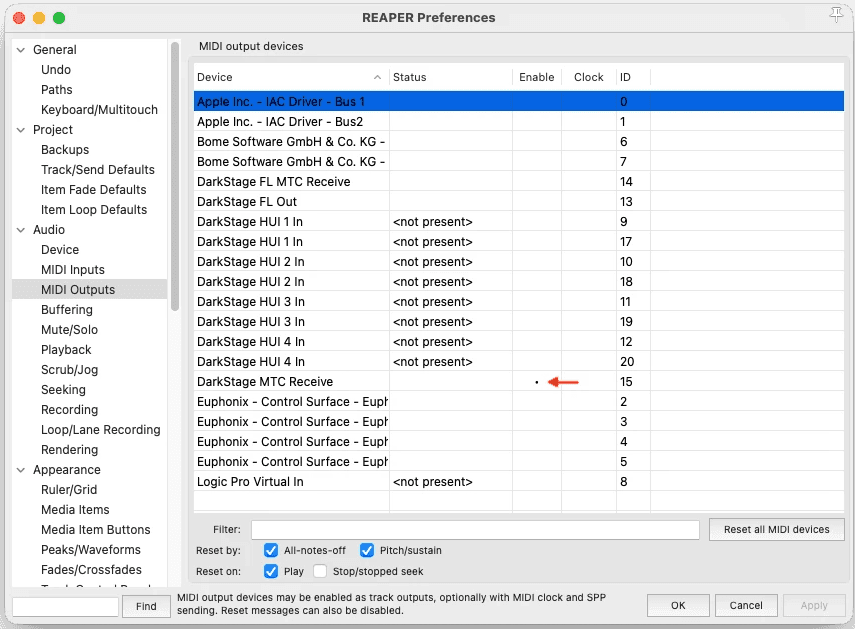
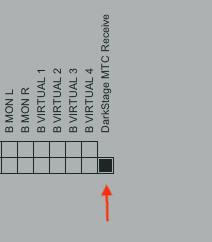
- In REAPER, open Options ▸ Preferences ▸ MIDI Devices and enable DarkStage MTC Receive as a MIDI output.
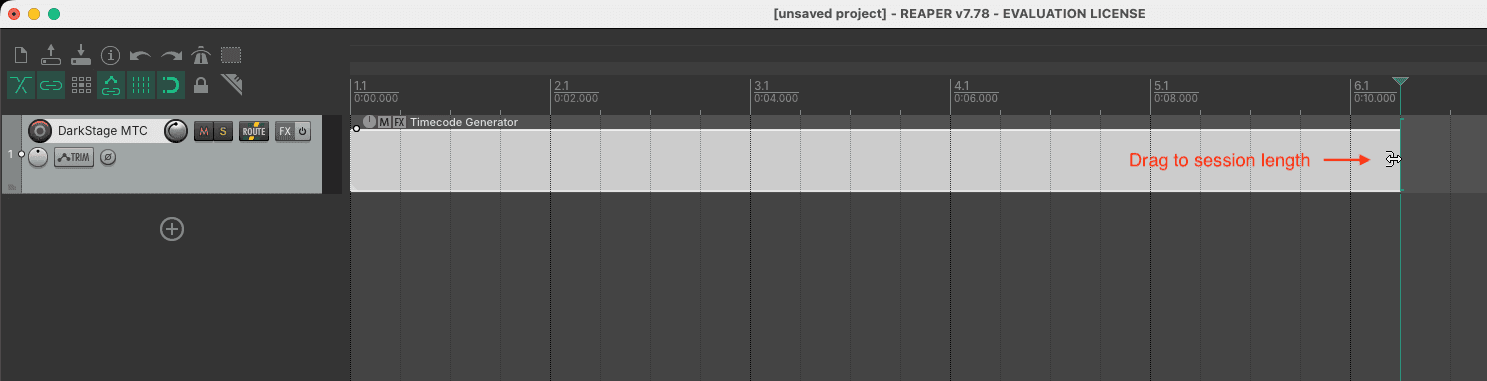
- Create a track for the timecode — calling it DarkStage MTC makes it obvious later.
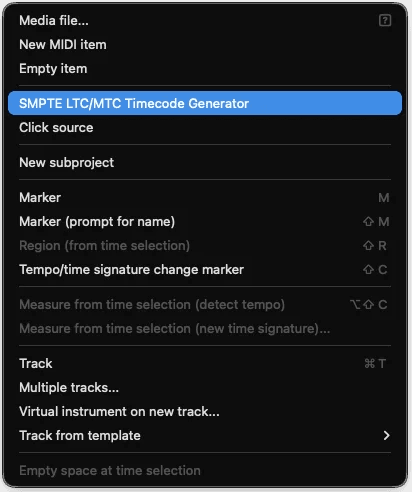
- On that track, insert REAPER's SMPTE LTC/MTC Timecode Generator.
- Open the item's Source Properties and set it to Send MIDI (MTC).
- Set the generator's frame rate to match your project frame rate.
- Set the track's MIDI Hardware Output to DarkStage MTC Receive.
- Extend or place the generator item across the part of the timeline you need timecode for.
- DarkStage's separate SMPTE widget now follows REAPER while the transport is rolling.
REAPER troubleshooting
- Nothing moves at all: re-open Options ▸ Preferences ▸ Control/OSC/web and check the surface is listed and enabled, Device port is
19848, and Pattern config reads DarkStage. - Pattern config empty or only “Default”: the integration file isn't installed — install it and re-open the dialog.
- Counter shows the wrong kind of value: change the REAPER Counter setting in DarkStage.
- Time signature isn't shown for REAPER — its OSC surface doesn't provide one, and DarkStage would rather leave it blank than guess.
- The SMPTE widget sits still while REAPER is stopped. That's expected — see the note above.
Need more help?
Email support@mydarkstage.com and we'll help you get set up.