Settings
Choices that apply to the whole app: what DarkStage listens to, which DAW it follows, your shortcuts and your preset library. Each display's own look is set in Wired Displays.
General
How DarkStage behaves on this Mac.
- Open DarkStage at Login: start with the Mac.
- Show DarkStage in Dock & App Switcher: behave like a normal app instead of living only in the menu bar.
- Keep Global Settings On Top: keep this window above other windows while you work. Off by default.
- Where's My Mouse?: after the pointer has sat still for the Idle Time (default 30 sec), your next move flashes a ring around it for the Ring Duration (default 1.1 sec). Choose a Ring Colour and use Test Ring to preview. Details in Mouse Options.
With several blacked-out screens it's easy to lose the pointer. Where's My Mouse finds it for you. Clicking or scrolling never triggers the ring.
If you leave Show DarkStage in Dock off, open this window with F13 or the menu bar icon. ⌘Tab won't find it.
Appearance / Graphics
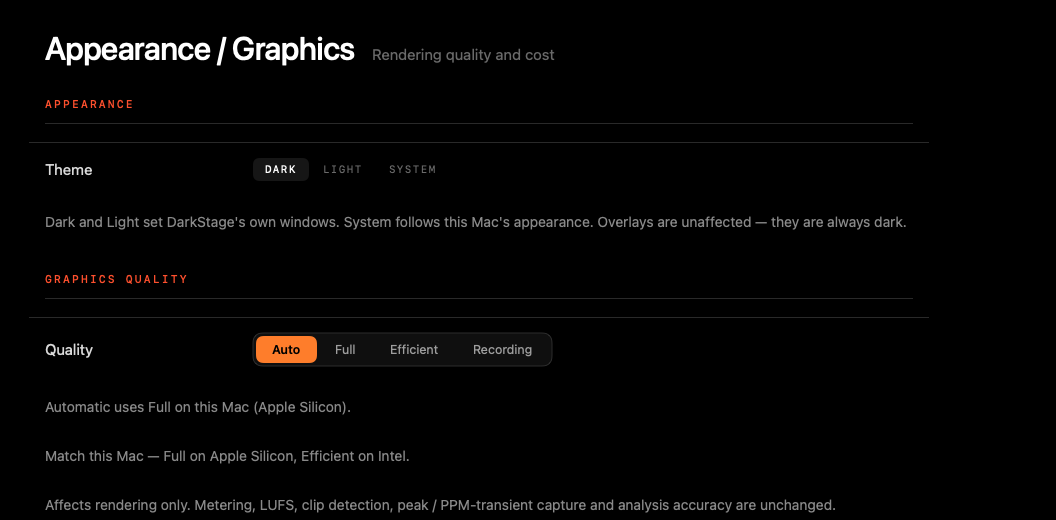
- Theme: Dark, Light or System, for DarkStage's own windows. Overlays are always dark.
- Quality: Auto matches the Mac (Full on Apple Silicon, Efficient on Intel). Full gives the highest refresh, Efficient suits older or busy Macs, and Recording leaves the most CPU, GPU and thermal headroom for your DAW.
Quality affects drawing only. Metering, LUFS, clip detection and peak capture stay just as accurate.
Use case
- Tracking a big session on a laptop: set Recording. The meters stay responsive and the DAW gets the headroom.
Shortcuts
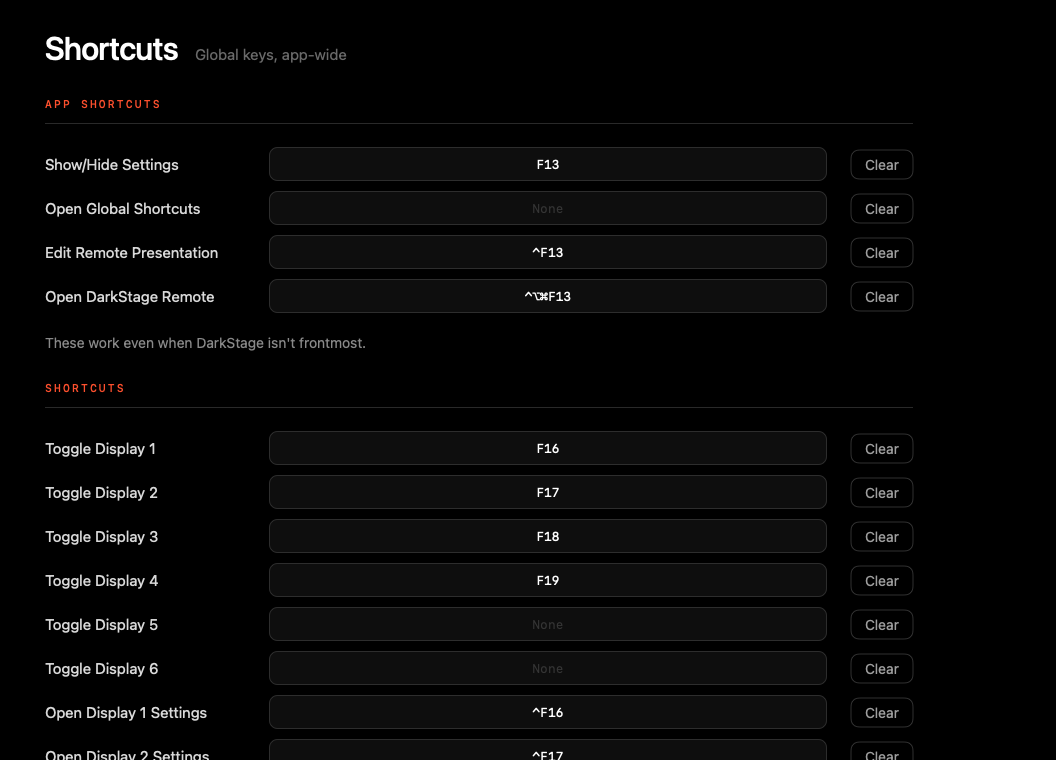
App Shortcuts open DarkStage's windows. Shortcuts control each display: toggle its overlay, open its settings, switch it to Transparent, or step through its presets. Click a field and press the key combination you want. Press Esc to cancel, or Clear to remove a shortcut.
Global shortcuts need Accessibility permission. If this page shows Accessibility access required, switch DarkStage on in System Settings ▸ Privacy & Security ▸ Accessibility.
Program a spare key on a control surface or Stream Deck to send F16–F19, and you can black out a screen without touching the Mac.
Give the displays you use most a single key with no modifiers. Keep modifier combinations for things you rarely do, such as Cycle Preset.
DarkStage Remote
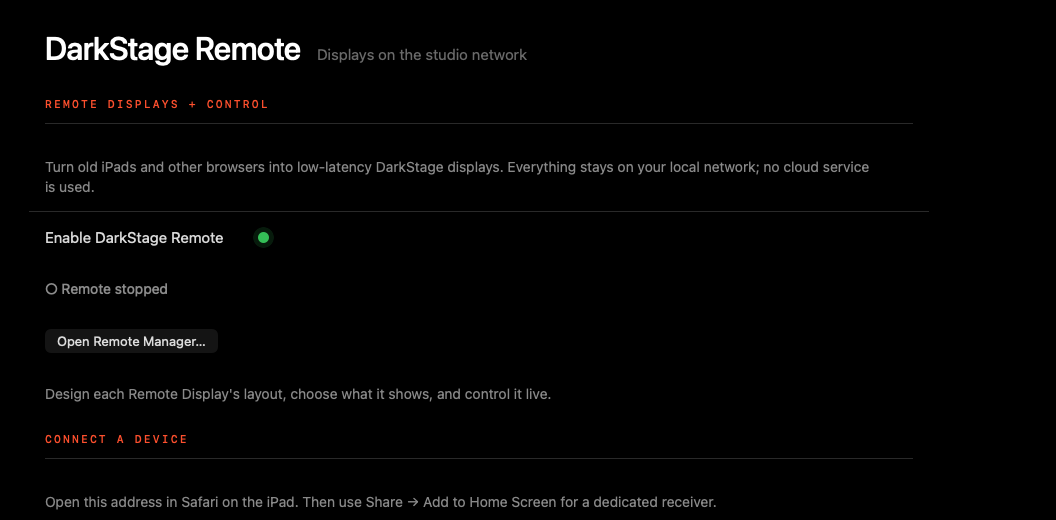
Turns iPads and other browsers on your network into DarkStage displays. Nothing leaves your local network.
- Enable DarkStage Remote, then Open Remote Manager… to design what each device shows.
- Connect a Device shows the address, a pairing code and a QR code. Use Print, Copy Address or New Pairing Code.
- Remote Displays lists paired devices, each with Edit Presentation and Forget & Disconnect….
More in WiFi Remotes.
Presets
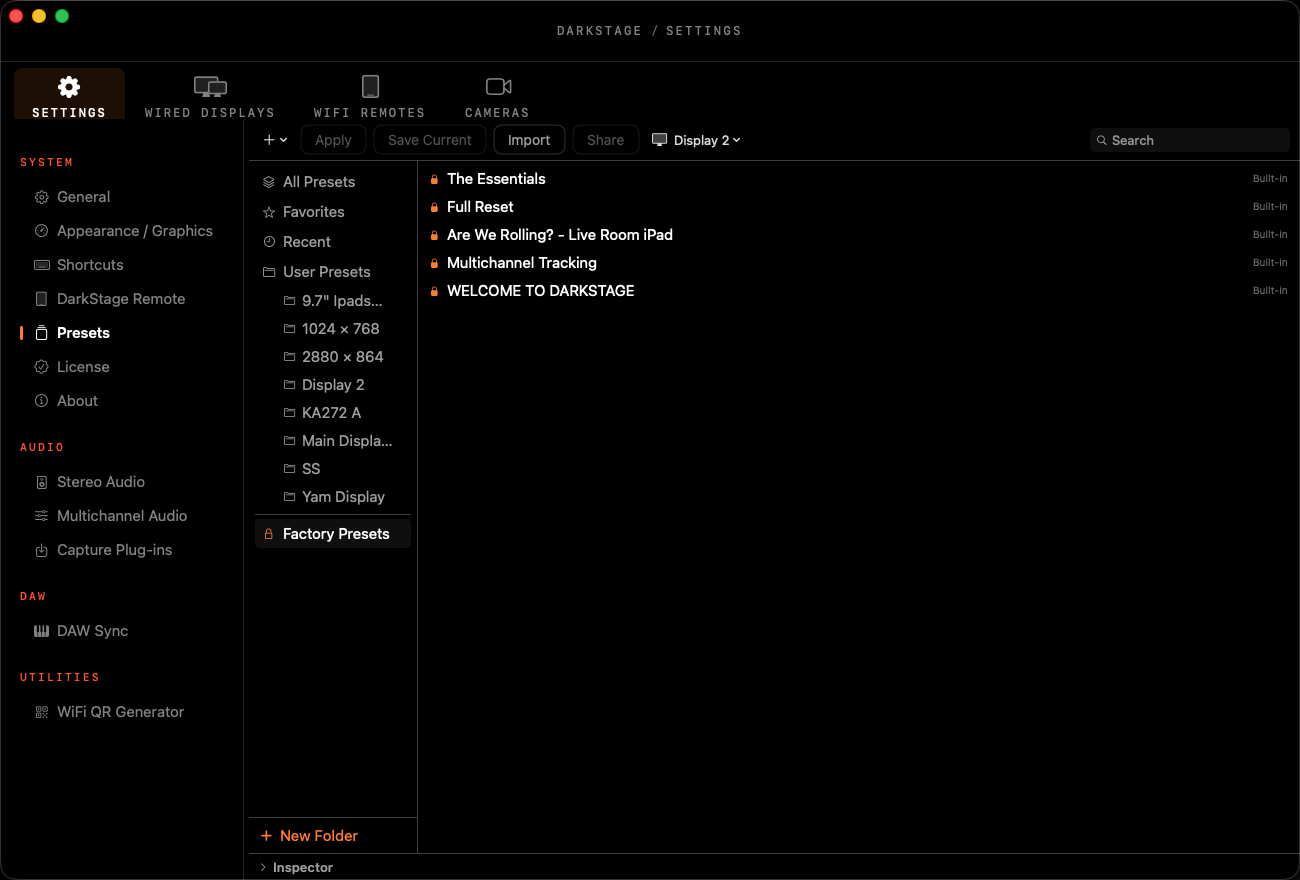
The library of full overlay presets: complete snapshots of a display's layout, widgets and settings.
- All Presets, Favorites, Recent, your User Presets folders, and read-only Factory Presets.
- The display menu in the toolbar sets which display Apply and Save Current act on.
- Import and Share move presets between Macs. Right-click a preset to Rename, Duplicate, Export or Show in Finder.
- Open Inspector at the bottom to add an author and description.
- Factory presets are locked 🔒. Right-click one and choose Duplicate as User Preset to make your own version.
Presets never change app-wide choices like your audio source, Hide Cursor or Where's My Mouse. To keep particular display settings too, tick Ignore Preset Recall beside them in Overlay Options.
Use cases
- Keep one preset per job: Tracking, Mix, Master. Recall it from the preset menu at the top of Wired Displays.
- Save a preset per client or studio room, then Share it to the Mac in the next room.
- Start from The Essentials factory preset: a bottom strip of waveform, PPM, spectrum and scope that leaves the rest of the screen free.
License
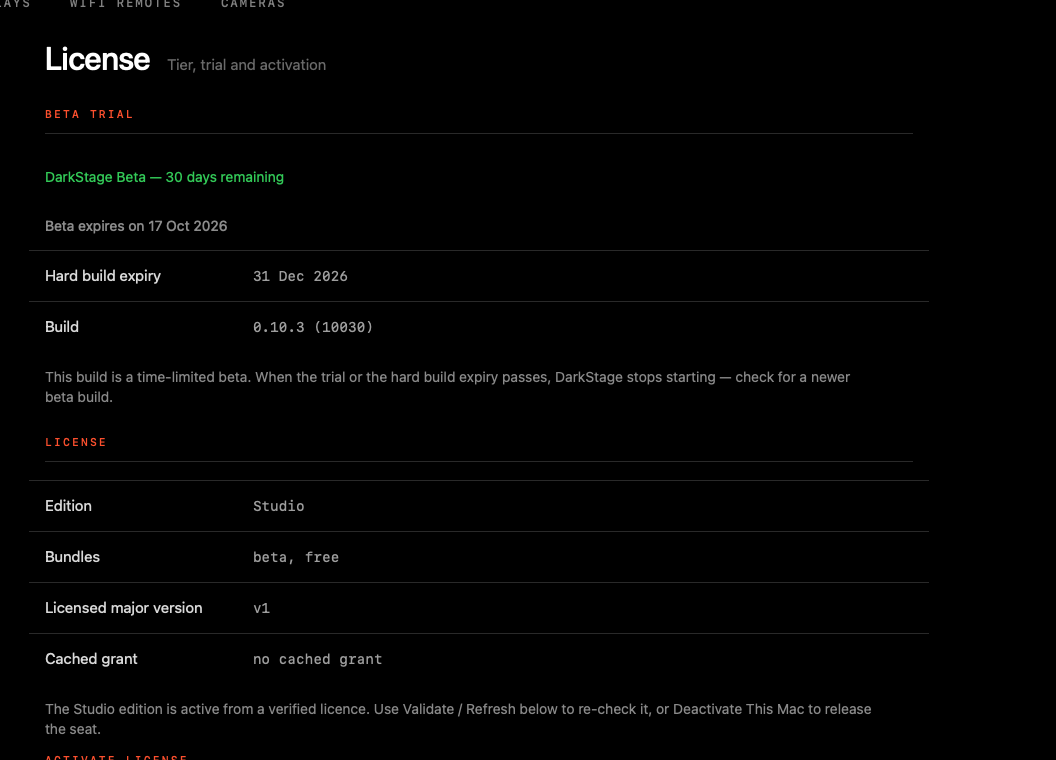
Shows your edition and, for beta builds, the trial status and build expiry date. When activation is available, enter your key here and click Activate. Deactivate This Mac frees the licence to use on another Mac.
About
Version, build and edition. Include these when you contact support.
The DarkStage menu's beta status window has Copy Diagnostic Info, which copies everything support needs in one go.
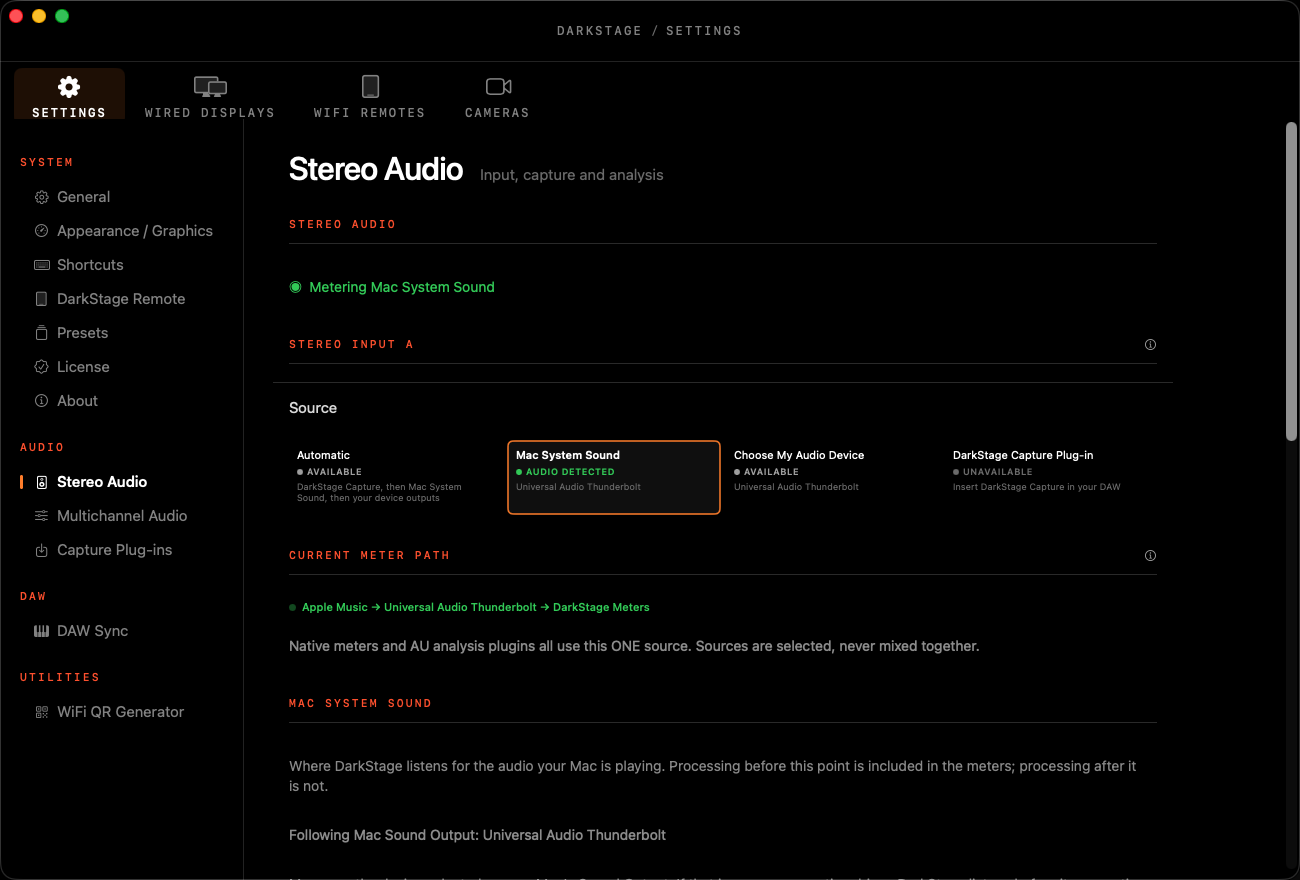
Stereo Audio
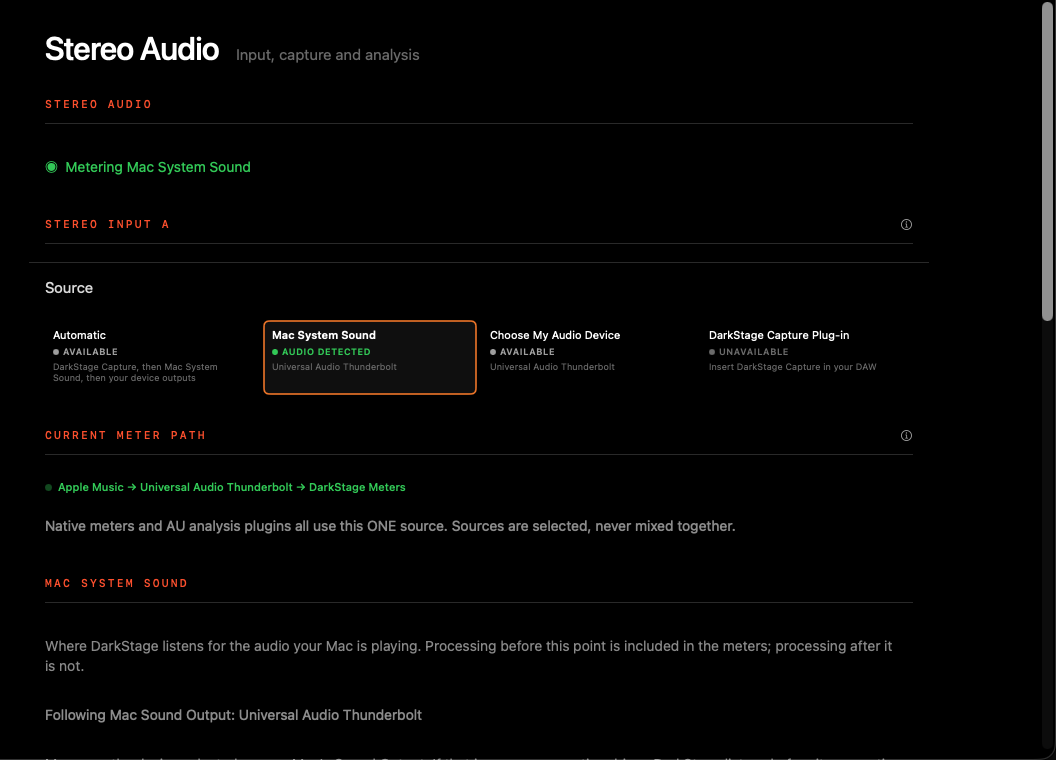
The stereo source for every meter and analyser. DarkStage measures one source at a time and never mixes sources together. Each tile shows its live state: Available, Ready or Unavailable.
| Source | What it hears |
|---|---|
| Automatic | DarkStage Capture while your DAW is feeding it. Otherwise Mac System Sound, then your remembered device. |
| Mac System Sound | Everything the Mac plays, including any monitor or room-correction processing. Needs macOS 14.2 or later. |
| Choose My Audio Device | A specific device. Choose the Device, then Signal (Device Inputs or Device Outputs) and Channels. |
| DarkStage Capture Plug-in | The signal at the point in your DAW where you insert the plug-in. See Plug-ins. |
Stereo Input B
A second stereo source, either a Capture plug-in or an audio device. Each widget can be set to Input A or Input B, so one overlay can show two signals side by side.
Use cases
- Room correction on your monitors? Mac System Sound would meter the corrected signal. Use Automatic or the Capture plug-in to meter the actual mix.
- Mix vs. reference: Input A on your mix bus and Input B on the reference track, each on its own LUFS Meter.
- Pro Tools HDX: choose a 2ch Pro Tools Audio Bridge as your DarkStage input device. Send from Pro Tools. Or use the included AAX DarkStage Capture Plugin
Device Outputs can't see audio that is mixed inside an interface's own DSP. To meter that, route it to an input.
Read Current Meter Path (for example Apple Music → Universal Audio Thunderbolt → DarkStage Meters) to check exactly what you're metering before trusting a number.
Input B only runs while a widget set to B is on a display, so setting it up costs nothing until you use it.
Multichannel Audio
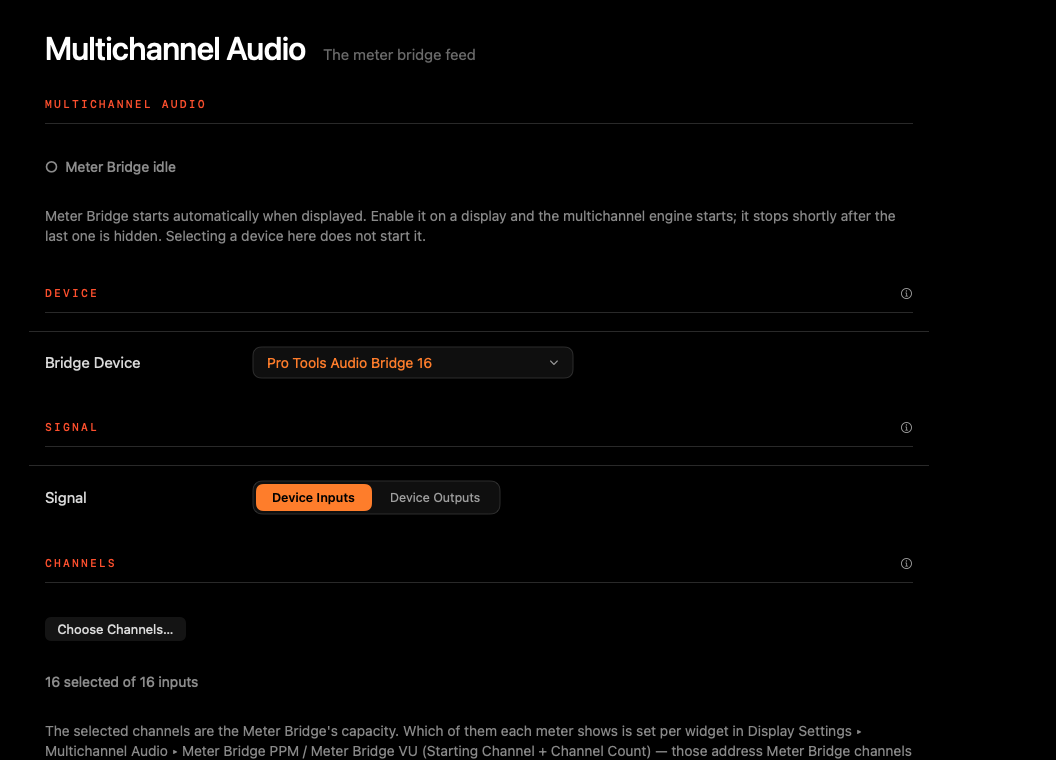
The feed for the two Meter Bridge widgets.
- Choose a Bridge Device, for example Pro Tools Audio Bridge, BlackHole 64ch or your interface.
- Choose Signal: Device Inputs (what's coming in) or Device Outputs (what's being sent out). Each keeps its own channel selection.
- Click Choose Channels…, tick the channels you want and click Save. Or use Use All Channels.
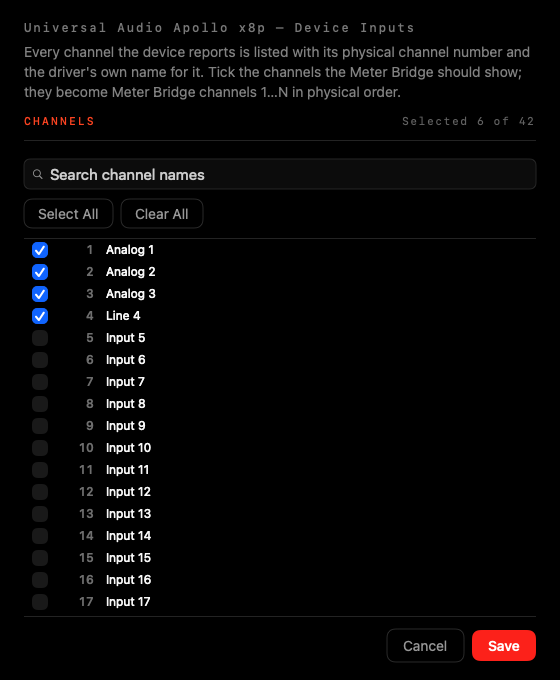
- Every channel is listed with its number and the driver's own name. Search channel names to find one fast.
- ⇧-click a checkbox to tick a range; Select All and Clear All act on the rows shown.
- The ticked channels become Meter Bridge channels 1…N in order. You can tick up to 64, and they can be any channel numbers, such as outputs 65–128.
Next, name them and choose which ones each bridge shows: see Wired Displays ▸ Multichannel Audio.
Use case
- Tracking a band: tick just the 16 record inputs of a 64-channel interface, then put a Meter Bridge on the live room TV so players can watch their own levels.
The bridge only runs while a Meter Bridge widget is showing, so leaving a device selected costs nothing.
Capture Plug-ins
Installs DarkStage Capture in Audio Unit, VST3 and AAX formats for every user on this Mac. Click Install Capture Plug-ins. The macOS Installer asks for your password; DarkStage never sees it. The status lines show what's installed, and the button changes to Update or Reinstall. When to use Capture is explained in Plug-ins.
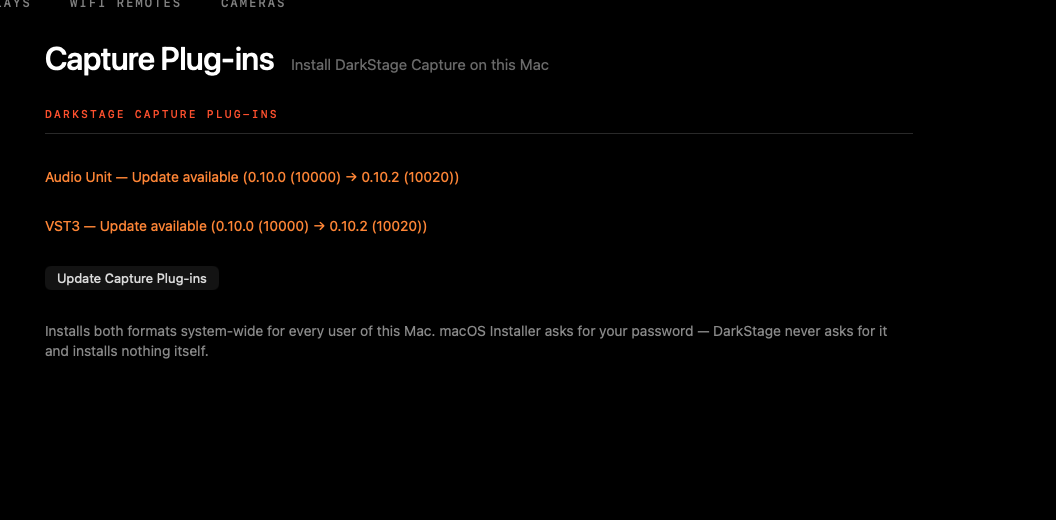
When an orange Update available line appears, quit your DAW before clicking Update Capture Plug-ins, so it loads the new version next time.
DAW Sync
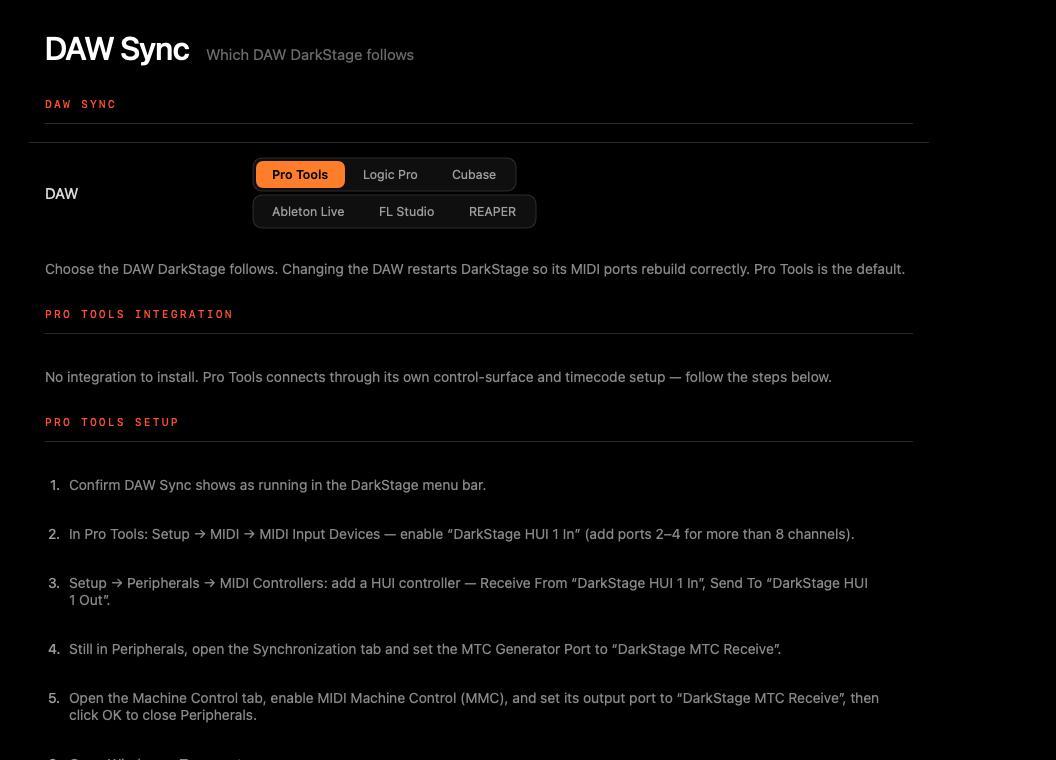
Choose the DAW that DarkStage follows. Under the picker are an Integration card (with an Install button if one is needed) and numbered Setup steps for that DAW. Most DAWs also get an If something does not follow card. Full steps for every DAW are in Setup.
The menu bar shows DAW Sync status: Waiting for DAW, Stopped, Playing, Armed or Recording. If the counter isn't moving, check it there first.
WiFi QR Generator
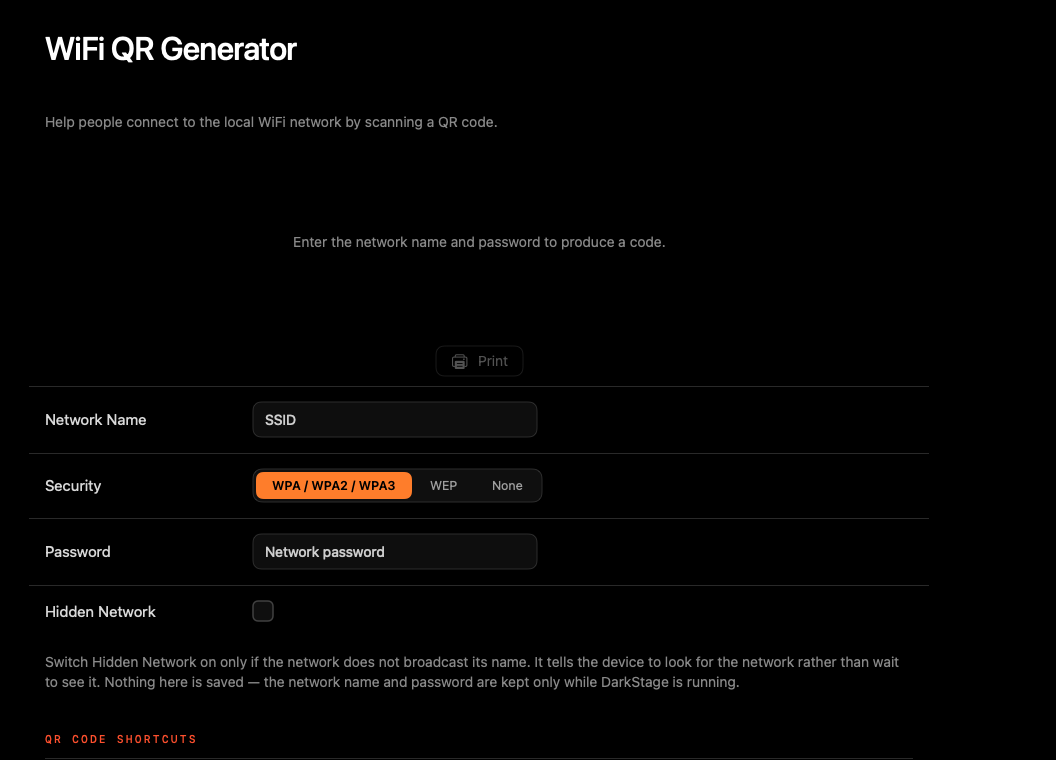
Enter the network name, security type and password to get a QR code that joins guests' phones and iPads to your WiFi. Click Print to print it. Nothing is saved: the details are kept only while DarkStage is running. The shortcuts below it show QR codes for the Remote and Shared Display links.
Use case
- Print the WiFi code and the Shared Display code on one sheet for the lounge wall. Clients join the network, scan, and watch the session counter on their phone.