WiFi Remotes
Turn an old iPad, a phone or any web browser on your network into a DarkStage display: a record light for the live room, a warning on the studio door, or a bars:beats counter for the string section.
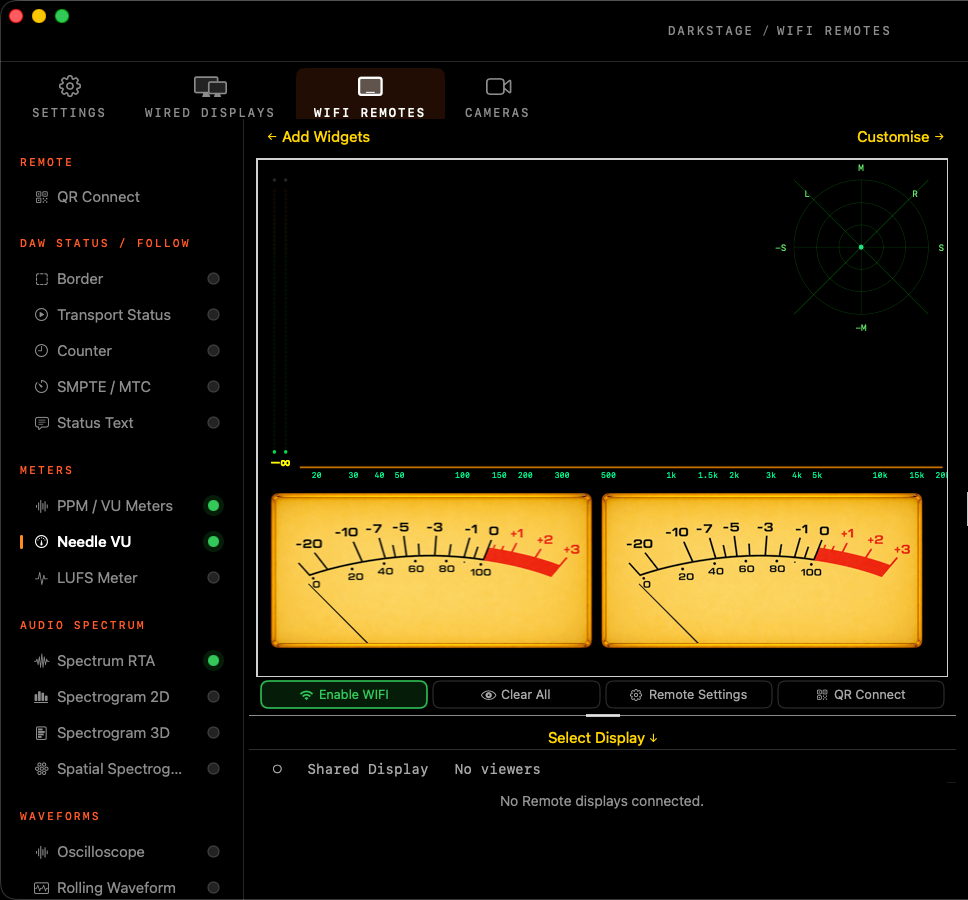
Connect a device
- Click Enable WIFI under the canvas, or turn on Enable DarkStage Remote in Settings ▸ DarkStage Remote.
- Click QR Connect. On the iPad or phone, scan the QR code, or type the address shown into Safari. Only Safari allows saving of a WebApp to the homescreen.
- In Safari, choose Share ▸ Add to Home Screen. The display then opens full screen, like an app.
- The device appears in the device list under the canvas. Select it and switch widgets on.
Everything stays on your local network. The Mac and the device must be on the same network, and no cloud service is used.
Design what each device shows
Each connected device has its own layout. Select it in the device list, then switch widgets on from the sidebar just as you would for a wired display.
| Sidebar group | Widgets |
|---|---|
| Remote | QR Connect |
| DAW Status / Follow | Border, Transport Status, Counter, SMPTE / MTC, Status Text |
| Audio | Meters, spectrum, waveforms, phase and Meter Bridges. See below |
| Utilities | Text Box, Studio Clock, Image |
| Controls | Button Panel |
Quick actions under the canvas: Enable WIFI, Clear All, Remote Settings and QR Connect. The preset menu at the top right saves and recalls remote layouts. Press ⌃F13 to jump straight to this tab.
Audio widgets on a remote
Remotes can show DarkStage's meters and analysers too, drawn live on the device from data the Mac streams over your network.
| Group | Widgets |
|---|---|
| Meters | PPM / VU Meters, Needle VU, LUFS Meter |
| Audio Spectrum | Spectrum RTA, Spectrogram 2D, Spectrogram 3D, Spatial Spectrogram |
| Waveforms | Oscilloscope, Rolling Waveform |
| Phase | Scope, Correlation Meter, Polar Sample, Polar Level |
| Other | Tuner, Visualiser (Plasma) |
| Multichannel Audio | Meter Bridge PPM, Meter Bridge VU, using the same Channel Names as your wired displays |
- Input A or B: each stereo widget has an INPUT A/B switch in its settings, just like on a wired display. Meter Bridges use the multichannel device instead.
- Live, not recorded: the Mac sends the newest values only, so a slow network skips frames rather than falling behind.
- Light on the network: even a 64-channel Meter Bridge needs only a few kilobytes per second.
- A remote shows the first instance of a widget. A few looks are simplified on remotes: Nixie Tube meters draw as Plasma, some VU faceplates fall back to Classic, and only the Plasma Visualiser is available.
After updating DarkStage, reload the page on each device (or reopen it from the Home Screen) so it picks up the new widgets.
Spectrogram 3D is the heaviest widget to draw. On an older iPad, choose Spectrogram 2D or Spectrum RTA instead.
Use cases
- Singer's loudness check: an iPad in the booth with a big PPM and LUFS Meter, so the vocalist can see how hard they're hitting the mic.
- Band monitor: a Meter Bridge VU on a tablet at the rehearsal side of the glass.
- Mastering client: a phone on the client's desk showing Correlation and LUFS while they listen.
Shared Display
The Shared Display row at the top of the device list is one layout that any number of people can watch. Select it and the QR Connect page shows a Broadcast Link, with Watching now, Copy Link and New Join Link. Make a new link to stop old ones working.
Print the Shared Display QR code from Settings ▸ WiFi QR Generator, next to your WiFi code, and pin it up in the client lounge.
Ideas
Recording light
- An iPad outside the live room door showing a full-screen Transport Status wash: red when recording, dark when stopped.
Players' counter
- An iPad on each music stand with a large Counter in bars:beats and a Metronome flash.
Talkback-free cues
- Status Text reading STANDBY when armed and GO when recording, for a booth with no headphones.
Remote transport
- A Button Panel with DAW Aware Play, Stop and Record on a phone at the drum kit. DAW Aware buttons don't need the DAW to be in front on the Mac.